

Assign staff to bookings by opening your staff list, attaching the right names to a service or availability slot, and saving the change. That’s the mechanical part. The part admins skip, and later regret skipping, is verification: confirm each staff member’s calendar sync is active, check that their account has the licensing or access required to appear in the online booking flow, and run one live test booking before customers ever see the page.
- Add or select staff in your booking admin console, then attach them to a service.
- Check the availability source (personal calendar vs. shared mailbox) feeding that assignment.
- Confirm licensing/account access, since unlicensed staff often vanish from booking pages.
- Run a preview-as-customer test to catch gaps before launch.
Platforms like ExpressBook layer in round-robin scheduling and a cross-store filter for teams juggling more than one location, both of which solve problems that plain staff lists tend to expose only after a double-booking happens.
Key Takeaways
Assigning staff to bookings works reliably only when calendar sync, licensing, and location assignments are verified together, not treated as separate steps.
| Point | Details |
|---|---|
| Attach staff correctly | Open the service, use Assign Staff, and choose between “all selected” or “one of selected” modes. |
| Check licensing first | Unlicensed or unlinked staff accounts silently disappear from booking pages without an error message. |
| Watch calendar sources | Personal calendars, shared mailboxes, and external syncs each affect availability differently. |
| Prevent cross-location conflicts | Use a cross-store filter or unified dashboard so one staff member can’t appear free at two sites at once. |
| Test before publishing | Preview as a customer, make a live booking, and confirm calendar notifications actually arrive. |
| ExpressBook as the fix | ExpressBook combines real-time sync, cross-location conflict detection, and a mobile admin app to prevent these issues from the start. |
Table of Contents
- How to Assign Staff to a Service or Booking
- Building a Staff List That Actually Works
- Who Should Be Able to Edit vs. Just Get Assigned?
- Assigning Multiple Staff and Rotating Coverage
- Fixing “Staff Not Listed” and Double-Booking Errors
- Pre-Publish Checklist Before Customers Can Book
- Lessons From Managing Multi-Site Schedules
- Let ExpressBook Handle the Assignment Problems for You
- Helpful Pages to Read Next
- Sources
How to Assign Staff to a Service or Booking
The core admin flow looks almost identical across most booking platforms, whether you’re working in ExpressBook or a Microsoft-style console. Here’s the sequence:
- Open your bookings admin page and navigate to Services.
- Select Edit on an existing service, or Create a new one.
- Locate the Assign Staff section within that service’s settings.
- Choose your assignment mode, either every eligible staff member or a single person per booking.
- Set whether the customer sees a specific staff name or a generic pooled label.
- Save the service and confirm it appears correctly on your public booking page.
A few settings decide how this plays out for customers:
- Assign all selected staff lets any qualified team member take the booking, useful for services with interchangeable providers.
- Choose one staff per booking locks a customer to a specific person, common for stylists, therapists, or trainers with repeat clients.
- Customer-facing name visibility can be toggled on or off depending on whether you want to advertise individual providers.
- Licensing and account checks need to pass before a staff member shows up as assignable at all, a step covered in the step-by-step assignment procedure for multiple staff.
Pro Tip: Build a throwaway “test service” first, assign one staff member to it, and run a booking through it privately. It takes two minutes and catches configuration mistakes before a real customer hits them.
Building a Staff List That Actually Works
Every staff record needs more than a name to function inside a booking system. Set up each entry with a contact email, a connected calendar or account, the correct time zone, a location assignment (critical for any business with more than one site), and the services or skills that person is qualified for.
The calendar source you attach matters more than most admins realize. A personal calendar synced directly reflects real-time conflicts, while a shared booking mailbox can lag or miss personal appointments entirely, according to FAU’s guidance on adding staff to Bookings. Stale calendar data is one of the most common reasons a staff member looks free when they aren’t.
Licensing callout: many platforms require staff to hold a licensed seat or a properly linked account before they can appear as assignable in the public booking flow. Skip this step and the staff member simply won’t show up. If you need the field-by-field basics for creating that first staff record, Wheaton’s staff-list walkthrough covers the minimal setup.
Who Should Be Able to Edit vs. Just Get Assigned?
Not every person on your staff list needs the same level of control, and handing out broad access “just in case” is how scheduling systems become messy. Most booking platforms split permissions into a few practical tiers.
- Team member: appears as an assignable option on services but can’t change settings.
- Scheduler: manages calendars, edits services, and handles customer records.
- Viewer: read-only access, useful for front-desk staff who need visibility without editing rights.
- Guest or contractor: assignable to specific bookings but restricted from broader account access.
The permissions that actually matter for assignment work are the ability to edit a service’s staff list, adjust someone’s availability, and accept or decline incoming bookings. Getting those three wrong is usually what causes conflicting edits between two schedulers on the same day.
Grant scheduler-level rights only to people who genuinely need to touch service settings. Every extra editor is another person who can accidentally reassign a shift or overwrite someone else’s availability window.
Assigning Multiple Staff and Rotating Coverage
Attaching more than one person to a service opens up two distinct modes: “assign all selected staff,” where any of them can take the booking, or “one of selected staff,” which the system rotates automatically. That rotation is a practical application of round-robin scheduling, an algorithm built to distribute work evenly rather than let one popular staff member absorb every slot.
- Add multiple names to a service, then pick the assignment mode that fits how your team actually works.
- Use manual rotation if certain staff should get priority (a senior stylist, a specialist trainer).
- Let round-robin handle equal distribution when any qualified staff member can serve the customer.
- Toggle customer-facing name visibility off for pooled services where the provider doesn’t matter to the client.
Pro Tip: Licensing restrictions apply per staff member, not per service. If one person in your rotation isn’t fully licensed on the platform, they’ll silently drop out of the pool instead of throwing an error, so check each name individually before publishing.
Fixing “Staff Not Listed” and Double-Booking Errors
Most assignment problems trace back to one of three causes, and each has a quick fix.
- Staff not appearing as assignable: check their license or account status first, then confirm they’re assigned to the location the service belongs to, and verify the “show in calendar” toggle is on.
- Double-bookings slipping through: turn on cross-store conflict detection, make sure calendar sync pulls in external events (not just internal bookings), and manually remove any shifts that overlap.
- Notifications not arriving: confirm the staff email address is correct, check that calendar integration is active, and resend the notification directly from the booking record if needed.
Time zone mismatches deserve a separate check. A staff member set to the wrong time zone can look available during hours they’ve actually blocked off, a subtle bug that only shows up once a customer books the “wrong” slot.
Pre-Publish Checklist Before Customers Can Book
Run this before flipping any staffed service live:
- Preview the booking page as a customer would see it.
- Make one real test booking and confirm it lands on the assigned staff member’s calendar.
- Check that confirmation emails and reminders both fire correctly.
- Create a few more test bookings to confirm round-robin or single-staff assignment behaves as expected.
- Verify location and time zone display correctly for each staff member.
- Test a substitution or reassignment to make sure the flow doesn’t break existing confirmations.
Lessons From Managing Multi-Site Schedules
The most common blind spot in staff assignment isn’t a broken feature, it’s a missing view. Admins running several locations often manage each site’s calendar separately, and that’s exactly how “shadow bookings” happen: a staff member gets double-booked because no single screen shows their full commitment across every site.
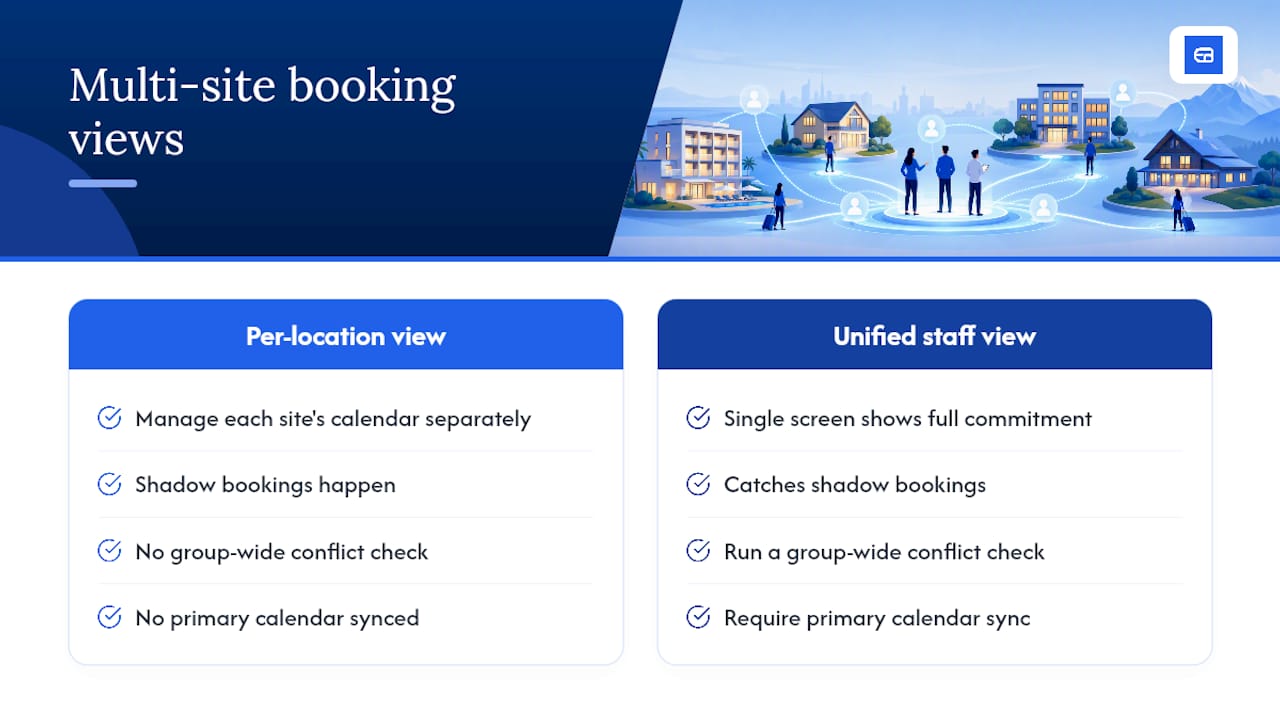
Pro Tip: Require every staff member to keep one primary calendar synced, and run a group-wide conflict check before publishing the week’s schedule. It’s a five-minute habit that catches problems a per-location view never will.
Let ExpressBook Handle the Assignment Problems for You
Most of the failure points covered above, calendars that don’t sync, staff invisible across locations, double-bookings nobody catches until a customer complains, are exactly what ExpressBook was built to eliminate. The platform gives you real-time calendar sync, cross-location conflict detection, and a dedicated mobile app for admins and staff, so you’re not stuck troubleshooting from a desktop when a schedule conflict pops up on a Saturday.
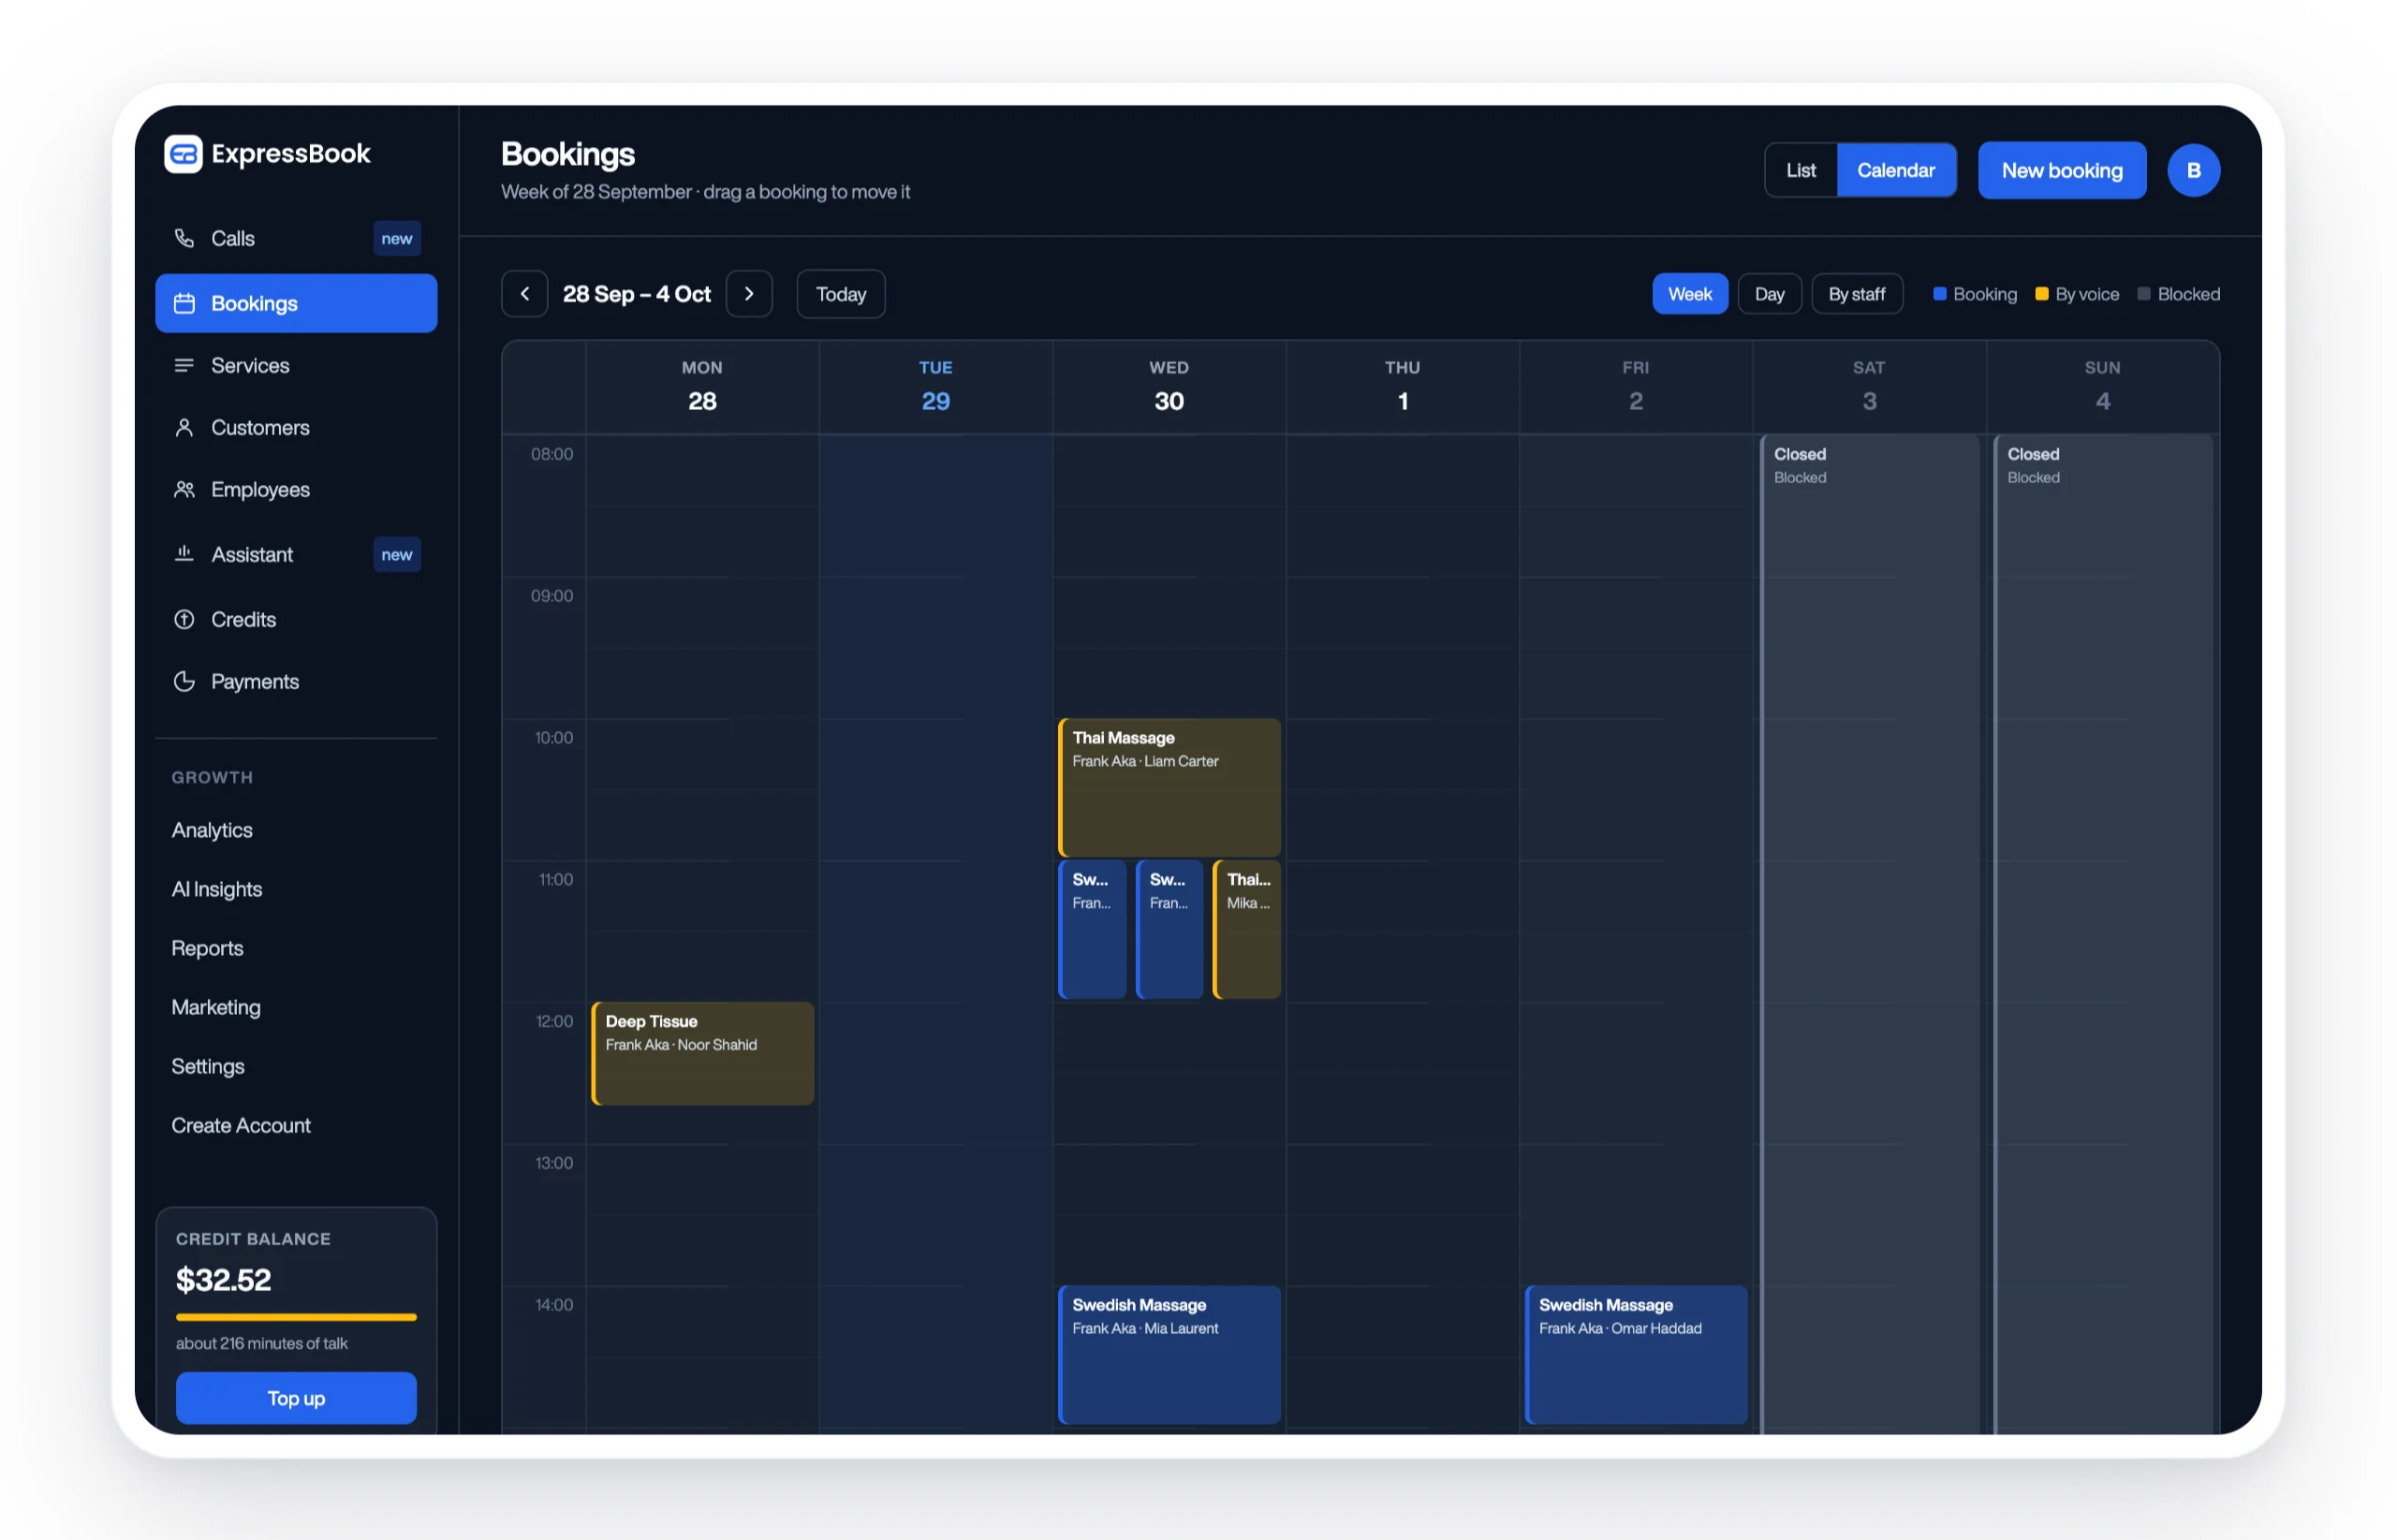
For teams juggling more than one site, ExpressBook’s multi-location scheduling tools unify staff visibility into one dashboard instead of forcing you to check each location separately. ExpressBook also includes a voice agent, letting visually impaired customers book appointments and get answers to business questions without needing a fully sighted interface. You can test the entire setup, staff assignment, calendar sync, and conflict detection, with a small credit top-up; there is no subscription. Start there, add your staff list, and run your own live booking test before you commit to anything.
Helpful Pages to Read Next
- Assign multiple staff, step by step
- Adding staff and managing time off
- Multi-location scheduling and conflict prevention
Sources
Three sources typically feed a staff member’s apparent availability: their personal calendar, a shared business booking mailbox, or an externally synced calendar. Each behaves differently, and mixing them without checking is where “ghost conflicts” creep in, staff showing as free because their calendar simply doesn’t reflect an external commitment.
Cross-location scheduling makes this worse. A staff member assigned to two sites can appear available at both simultaneously unless the system enforces a cross-store filter that overlays every location’s schedule. Multi-location platforms address this with shared conflict detection, a feature detailed in guidance on preventing double-booking across multiple sites.
Run through this before trusting any schedule:
- How to Assign Multiple Staff to Microsoft Bookings
- Microsoft Bookings: Add staff to Bookings – Knowledgebase / Software – FAU College of Medicine Support Center
- Microsoft Bookings – Adding Staff/Scheduling closures/time-off and vacation time/removing staff from access to a calendar
- Microsoft Bookings – Create your staff list
- Multi-Location Employee Scheduling Coordinator | RationalGo App Builder | RationalGo
Pro Tip: Turn on real-time calendar sync so bookings land directly as calendar events on staff devices. Email-only notifications get missed far more often than a native calendar alert.