These ready-to-use waitlist email templates let salons, clinics, gyms, and similar appointment businesses confirm queue position, notify openings, and recover canceled slots with a one-tap claim flow. Below you’ll find five templates: confirmation, periodic update, “your spot is ready,” claim expired or moved-on, and re-confirmation before expiry. Copy any of them, swap in your business details, and send.
TL;DR:
- Immediate confirmation emails should include placeholders for customer name, service, provider, and a clear claim window for time-limited slots.
- Waitlist update messages should be sent every 2 to 14 days, depending on the typical lead time and available cancellations.
- Claim notifications must be sent within minutes or hours depending on how close the opening is, with claim links prefilled to reduce abandonment.
- Automated systems should verify capacity, filter relevant candidates, and assign slots instantly, utilizing simple tools like Zapier and SMS to avoid overbuilding.
- Maintaining a list size of 10 to 20 names per slot and enforcing expiry policies of 30 to 60 days ensures trust and prevents lists from becoming ineffective.
Table of Contents
- Waitlist Email Templates You Can Copy and Send Today
- How to Use Each Template: Timing, Channels, and Data Fields
- Automating Waitlist Notifications Without Overbuilding
- Queue Models, Response Windows, and Fallback Rules
- Measuring Whether Your Waitlist Emails Actually Work
- What a Formal Waitlist Policy Actually Fixes
- Put These Templates to Work With ExpressBook
- Sources
Waitlist Email Templates You Can Copy and Send Today
A waitlist email template is a pre-written message that confirms a customer’s place in line, keeps them updated, and tells them the moment a slot opens up. For appointment businesses, five templates cover almost every scenario you’ll face; see how first-class waitlist and queue features for hospitality use handle queue position and configurable limits in operational best practices.
1. Waitlist confirmation (send immediately after signup)
Subject line options: “You’re on the [Business Name] waitlist” (neutral) or “Confirmed: you’re #[Position] in line” (urgency).
Hi [FirstName], you’re now on the waitlist for [Service] with [ProviderName]. We’ll email you the moment a spot opens, usually with a short window to claim it. Reply to this email if your availability changes.
Placeholders: [FirstName], [Service], [ProviderName], [BusinessName].
2. Periodic update (send every 2 to 14 days)
Subject line options: “Still on the list for [Service]” or “Quick update on your waitlist spot.”
Hi [FirstName], just checking in. You’re still on our waitlist for [Service]. No openings yet, but we’re actively watching for cancellations and will reach out the second one appears.
3. “Your spot is ready” (time-limited claim)
Subject line options: “A spot just opened for [Service]” or “Claim your spot in the next [X] hours.”
Hi [FirstName], a slot opened for [Service] on [DateTime]. Claim it by [ClaimDeadline] using the button below. After that, we’ll offer it to the next person on the list.
[ClaimLink]
Placeholders: [DateTime], [ClaimDeadline], [ClaimLink].
4. Claim expired or moved on
Subject line options: “That spot’s been claimed” or “Your window closed, here’s what’s next.”
Hi [FirstName], the [Service] slot on [DateTime] has been claimed by another customer. You’re still active on the waitlist, and we’ll notify you again as soon as something else opens.
5. Re-confirmation before expiry
Subject line options: “Still want to stay on the waitlist?” or “Confirm your spot before it expires.”
Hi [FirstName], you’ve been on our [Service] waitlist for a while. Reply “yes” or click below to stay on the list. If we don’t hear back by [ExpiryDate], we’ll assume you’ve booked elsewhere and remove your spot.
A quick appointment confirmation email framework works as a companion to these, since the tone and structure should match once a claimed slot turns into a booked one. Personalize each template with the specific service and provider name. A gym waitlist message for a spin class fills differently than a dermatology clinic’s message for a same-day skin check, and readers notice when the wording actually reflects what they signed up for.
How to Use Each Template: Timing, Channels, and Data Fields
Email works for confirmations and updates because a two-hour delay doesn’t cost the customer anything. Time-sensitive claim notices are a different story: SMS or push notifications outperform email when minutes actually matter. Send the confirmation email the moment someone joins. Use email or SMS for periodic updates, depending on customer preference. Reserve SMS or push for the actual “it’s open” notice whenever your booking window is under 24 hours.
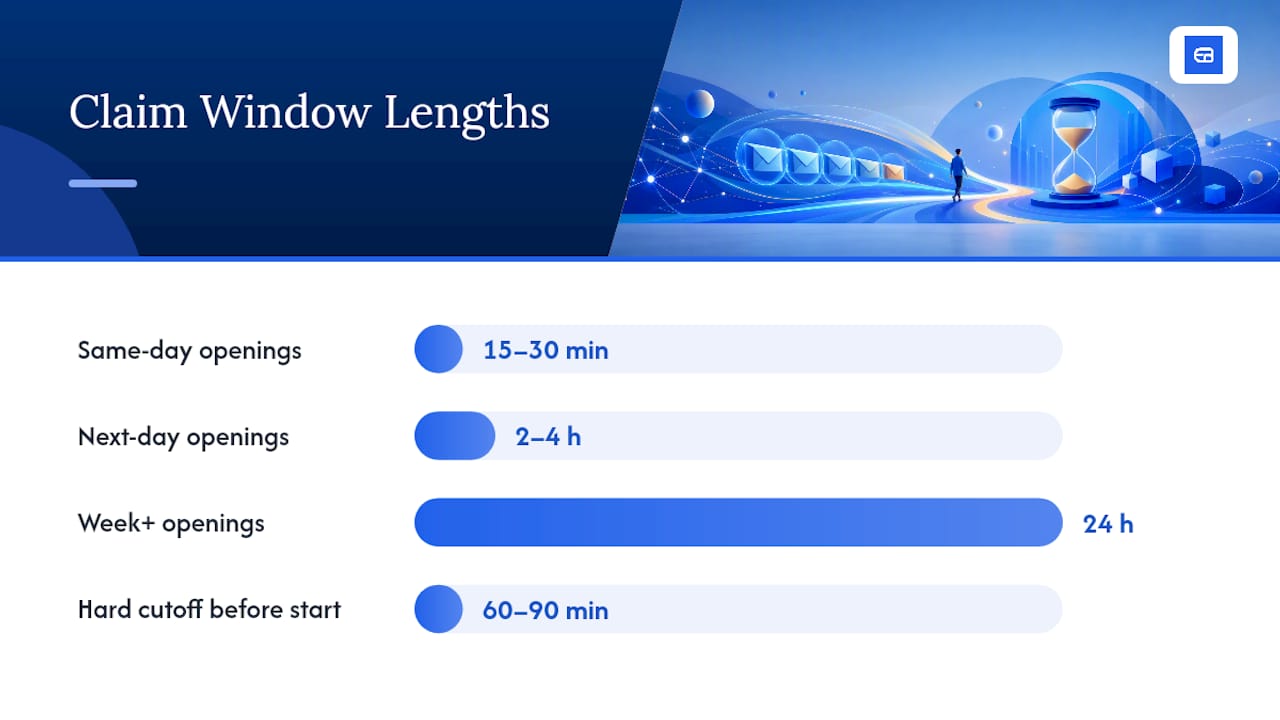
Timing by lead time typically looks like this:
- Same-day openings: notify within minutes, give a 15 to 30-minute claim window.
- Next-day openings: notify within an hour, give a 2 to 4-hour claim window.
- Openings a week or more out: email is fine, give a 24-hour claim window.
- Hard cutoff: stop offering claims within 60 to 90 minutes of the appointment start, and fill the slot manually instead.
Your waitlist form needs to capture the right fields upfront: service requested, provider preference, availability window, contact preference, and notification channel. Skipping any of these means your matching logic sends irrelevant offers, and irrelevant offers train customers to ignore your emails.
Pro Tip: Build your claim link with a prefilled query string (service, date, provider ID) so tapping it drops the customer straight into a near-complete booking form instead of a blank one. Fewer fields between “I want this” and “I booked this” means fewer abandoned claims.
Automating Waitlist Notifications Without Overbuilding
The technical core of any waitlist worth trusting is the atomic join: when a customer joins, the system checks capacity and either holds a place or assigns a queue position in one step. Skip this and you’ll oversell slots during high-traffic cancellations, according to booking-system design guidance.
A reliable automation flow runs like this:
- A cancellation triggers the system to check the waitlist.
- Matching filters (service, provider, time window) narrow the list to relevant candidates.
- A timed notification sequence goes out, tiered by lead time.
- The first person to claim gets the booking confirmed automatically.
- The outcome, claimed or expired, gets logged for reporting.
You don’t need custom development to run this well. A native waitlist module paired with simple automation tools like Zapier or Make, plus SMS through Twilio, can reach solid fill rates before you ever need a bigger system. Whichever route you pick, the claim link must avoid mandatory logins. Test the whole flow on a phone before launch: tap the claim link, confirm the expiry countdown behaves correctly, and check that the confirmation email fires the second a slot is claimed.
Queue Models, Response Windows, and Fallback Rules
Three promotion models exist: automatic booking (first person on the list is booked with no action needed), time-limited offer (customer has a window to claim), and manual promotion (staff reviews and assigns). For paid appointment bookings, the time-limited offer model is the safest default. It respects the queue order without locking a no-show customer’s inaction against everyone behind them.
Cap your waitlist at a realistic size, usually 10 to 20 names per slot type, and set an automatic expiry of 30 to 60 days for anyone who hasn’t responded to a re-confirmation prompt. Unbounded lists erode trust fast: nobody believes they’re “next” on a list of 80 people.
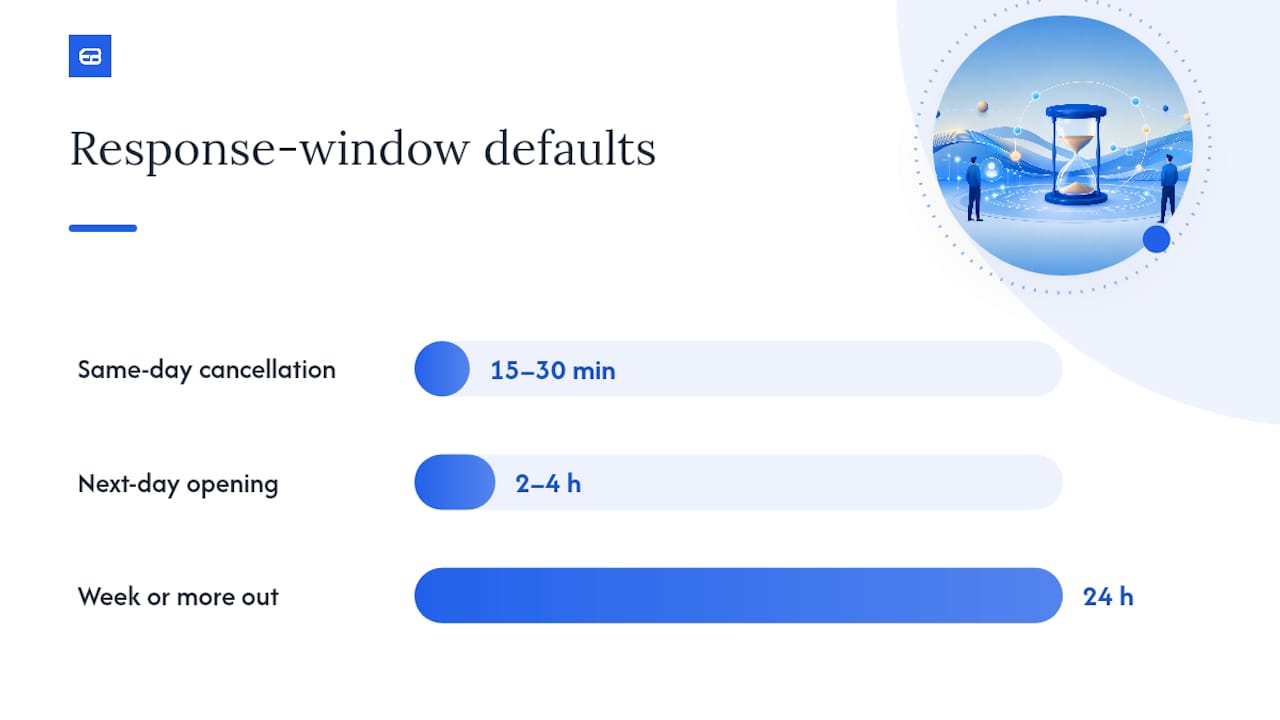
Response-window defaults by lead time:
- Same-day cancellation: 15 to 30 minutes to claim.
- Next-day opening: 2 to 4 hours to claim.
- A week or more out: 24 hours to claim.
Pro Tip: If your waitlist is exhausted and the slot is still open, don’t let it sit empty. Post it to your booking page as newly available, promote it on social, or offer it to walk-in customers. An open slot with no fallback is a missed appointment and a missed payment.
Measuring Whether Your Waitlist Emails Actually Work
Track five numbers: fill rate (percentage of open slots filled from the waitlist), average response time, no-response rate, list decay (how many names go stale before claiming anything), and claim-to-paid-booking conversion.
Run small tests before overhauling anything:
- A/B test subject lines: neutral versus urgency-framed.
- Compare SMS claim rates against email claim rates for the same slot type.
- Reduce friction on the claim link (fewer form fields, prefilled data) and measure the change in claim speed.
Log every outcome, claimed, expired, or declined, in your booking system or CRM so next month’s timing decisions are based on real numbers, not guesswork about what “feels” right.
What a Formal Waitlist Policy Actually Fixes
Businesses that write down their waitlist rules, instead of handling it ad hoc by phone, tend to see fewer walk-aways and less staff time lost to manual follow-up calls. A clear claim window and a documented expiry policy do the work a receptionist used to do by memory. If you’re weighing whether to formalize this, ExpressBook’s mobile app lets staff manage claims from the floor, and its voice agent lets visually impaired customers join or check a waitlist by phone without needing to see a screen. Try the templates above in a sandbox account before rolling them out to your live list.
— serge
Put These Templates to Work With ExpressBook
ExpressBook is the practical alternative to writing and tracking waitlist emails by hand across separate tools. It gives you a native waitlist module, a template library built for confirmations and time-limited claim notices, and automatic sync to QuickBooks and Xero so a claimed slot becomes a logged, reconciled booking without manual entry.
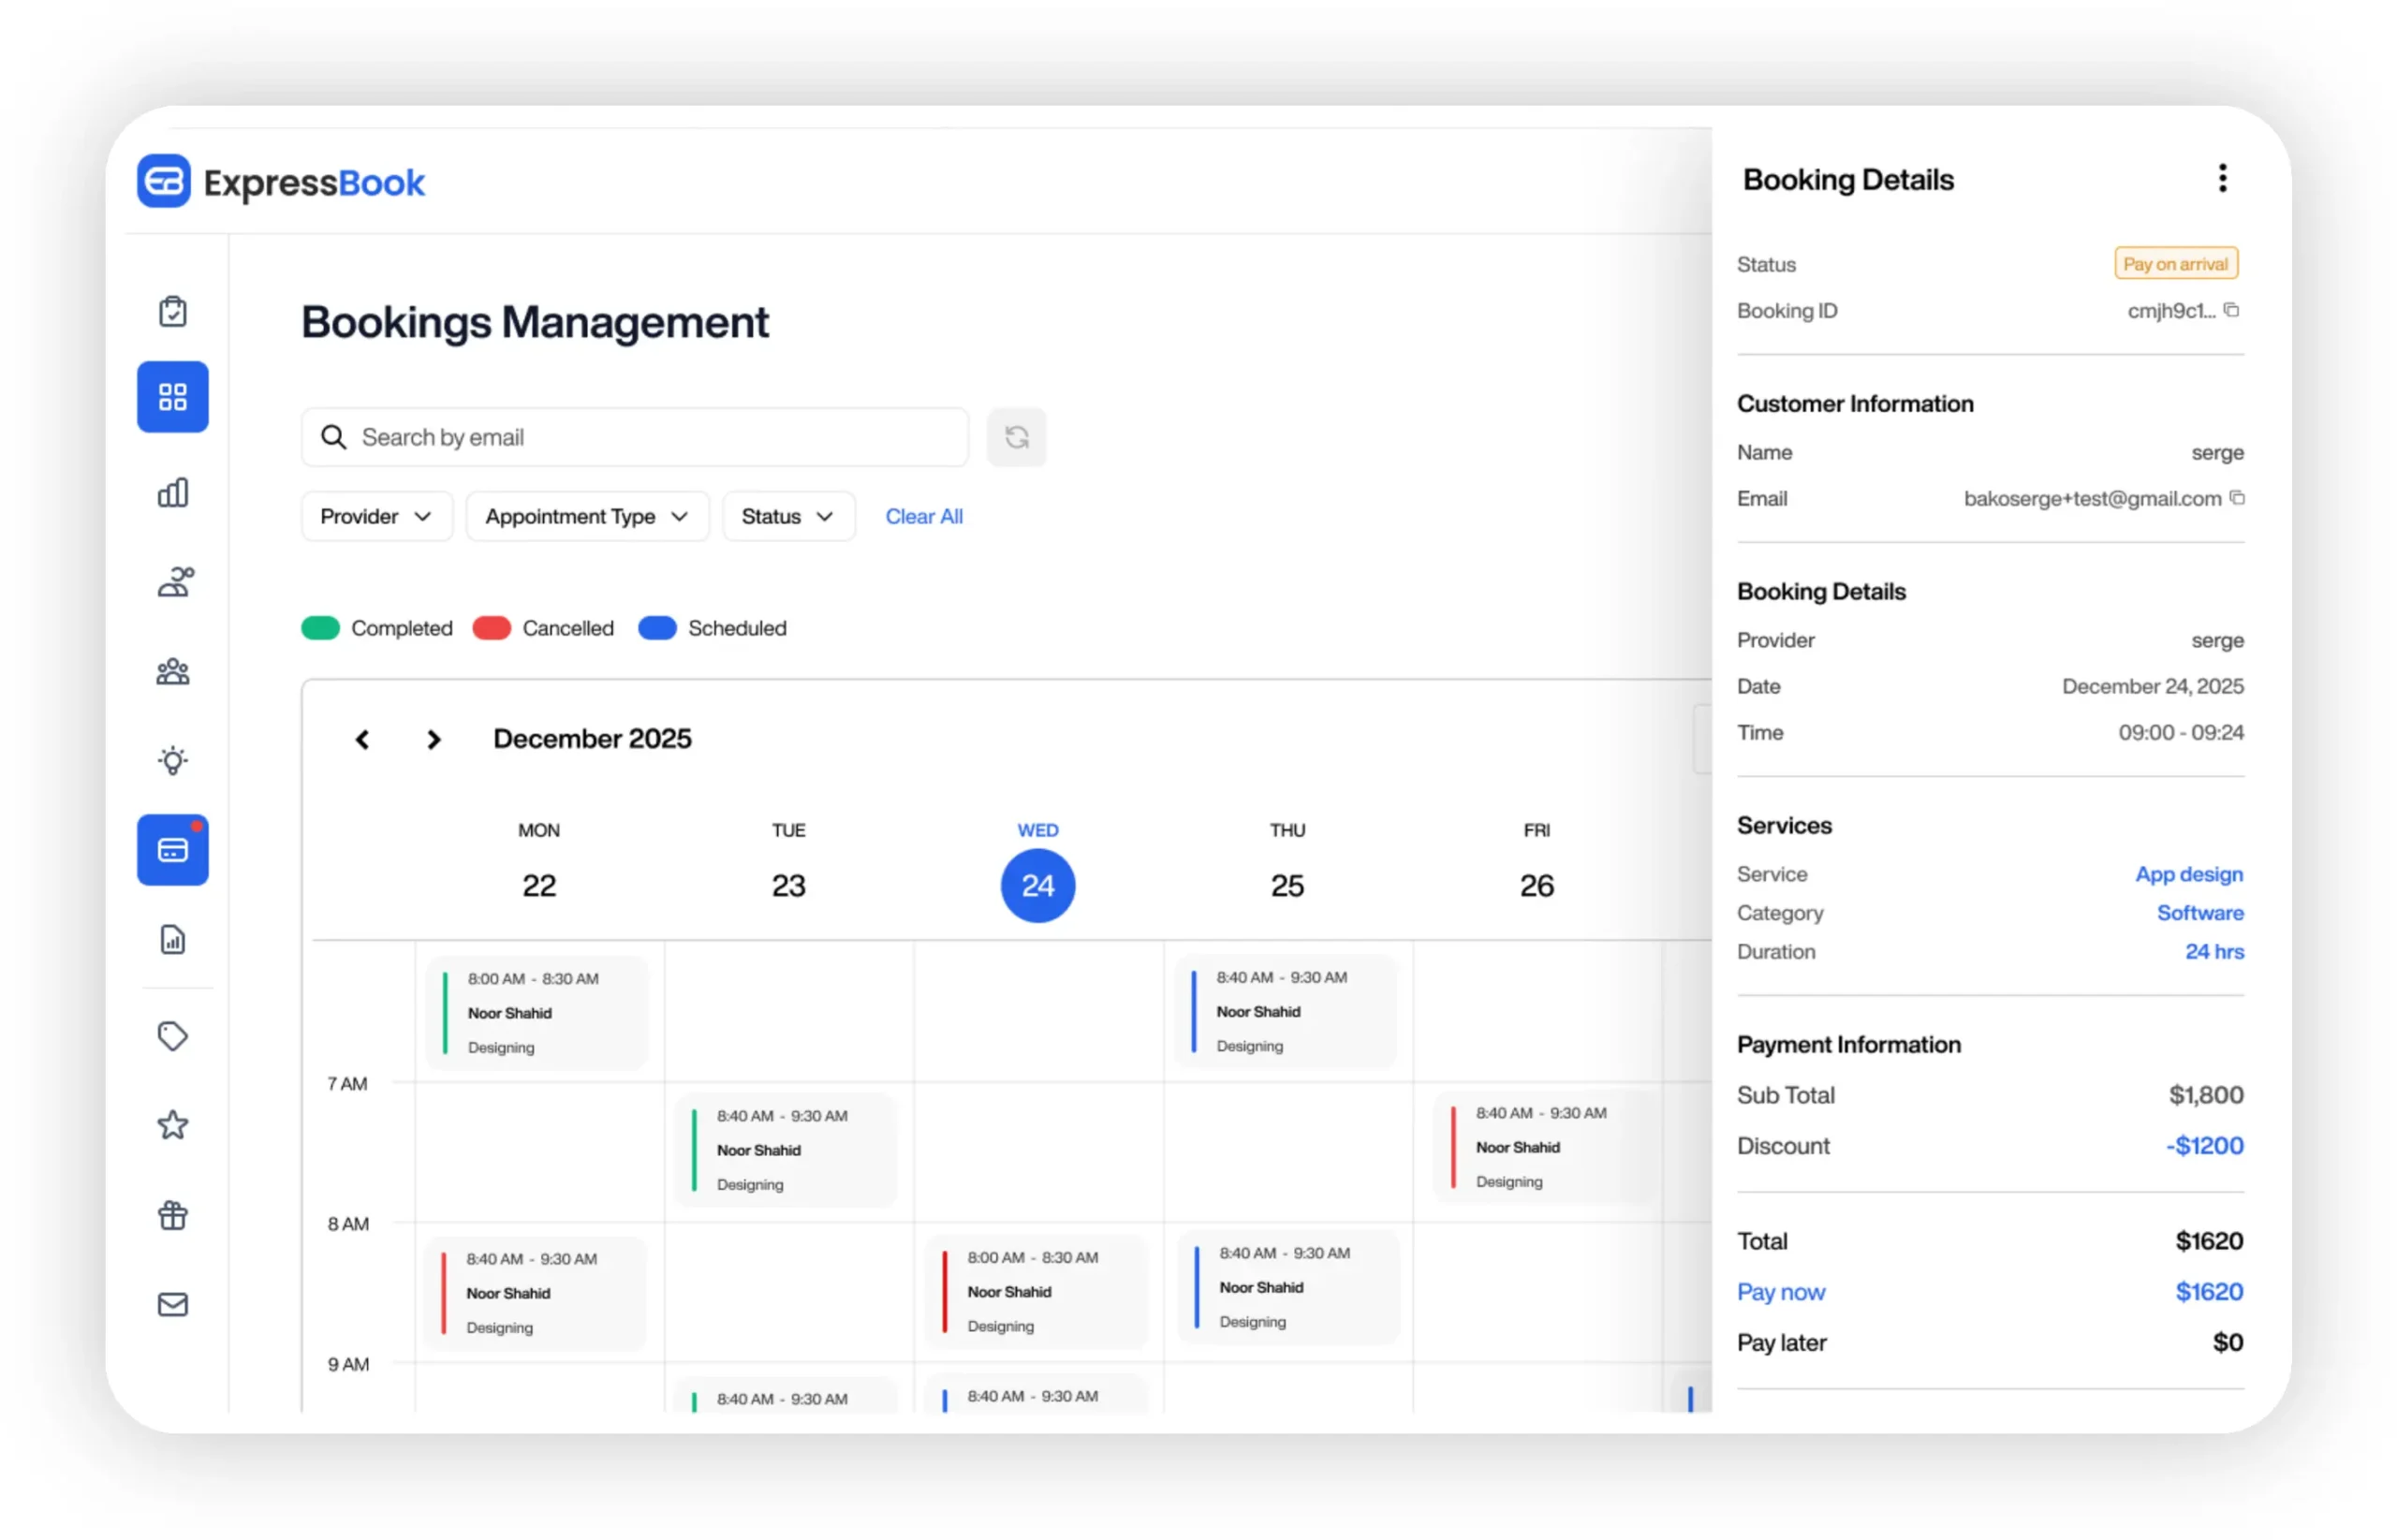
The platform’s mobile app lets you and your staff manage claims and cancellations from a phone at the front desk, and the built-in voice agent lets visually impaired customers join a waitlist or ask questions about your business without navigating a screen. Whether you run a med spa, a dental practice, or a group fitness studio, the same atomic join and tiered notification logic covered above runs automatically in the background.
ExpressBook offers up to 3 months of free trial so you can test these exact workflows on your own waitlist before committing. Start with a service-specific setup, like beauty and aesthetic scheduling or a health practice booking flow, and see how your fill rate changes in the first few weeks. If you manage multiple providers or locations, the dental appointment scheduling setup shows how the same waitlist rules scale across a bigger calendar.
Sources
- How Booking Waitlists Should Work | Talk Think Do
- Koira
- How to Write a Waitlist Email That Keeps Customers Engaged – NextMe